Category: Free Inquiry (Page 1 of 2)

This is the category to apply to your Free Inquiry posts.

The Final Rendition

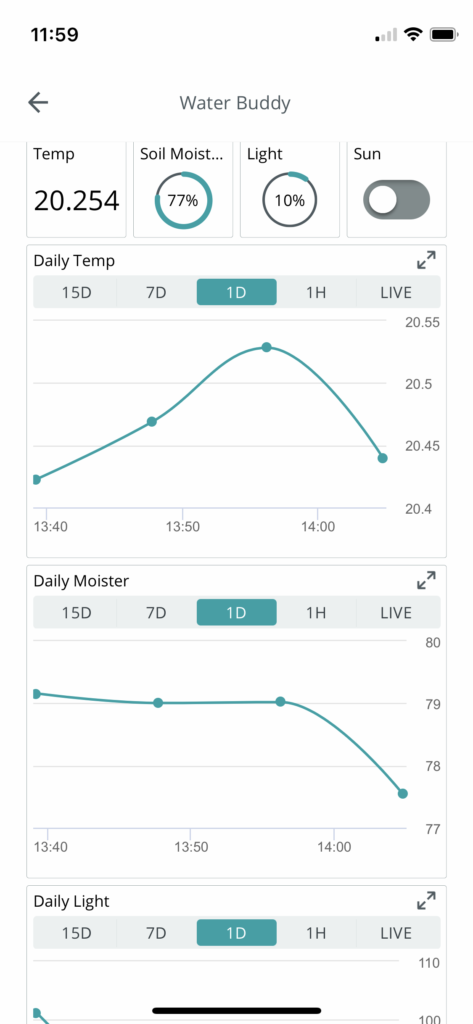
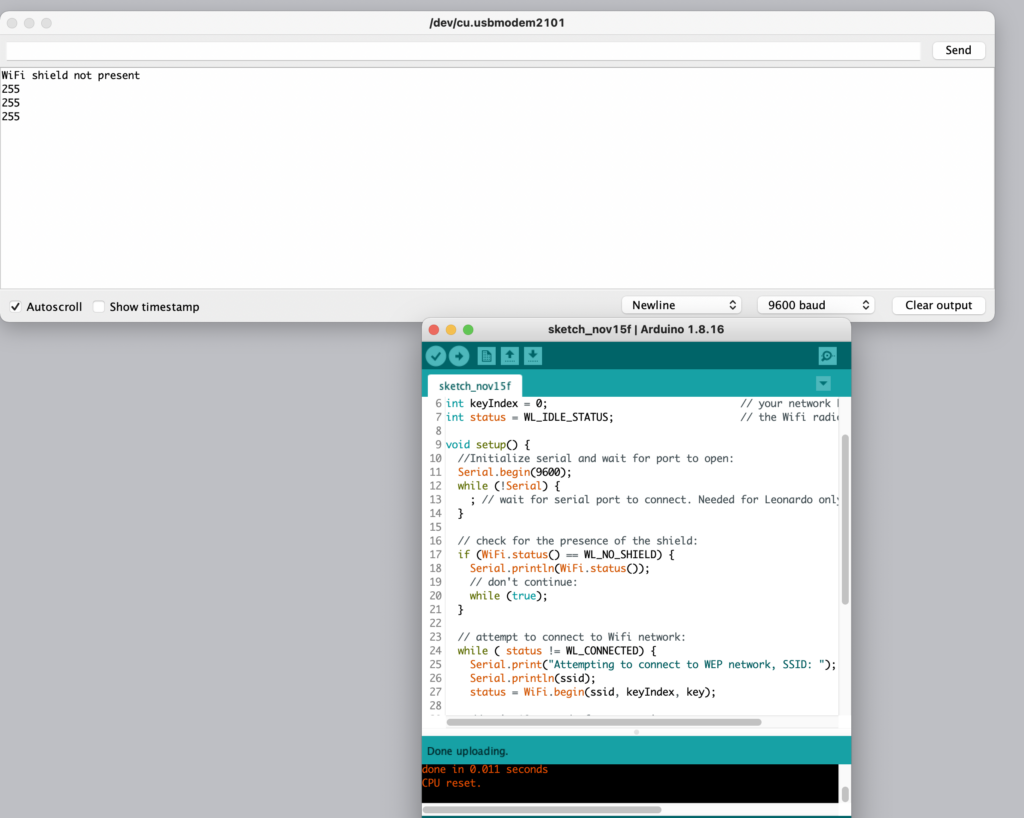
It’s finally done and works great! I was able to get my Arduino IOT account working and operational. I was even able to get the IOT app and control/ monitor my Arduino garden remotely!

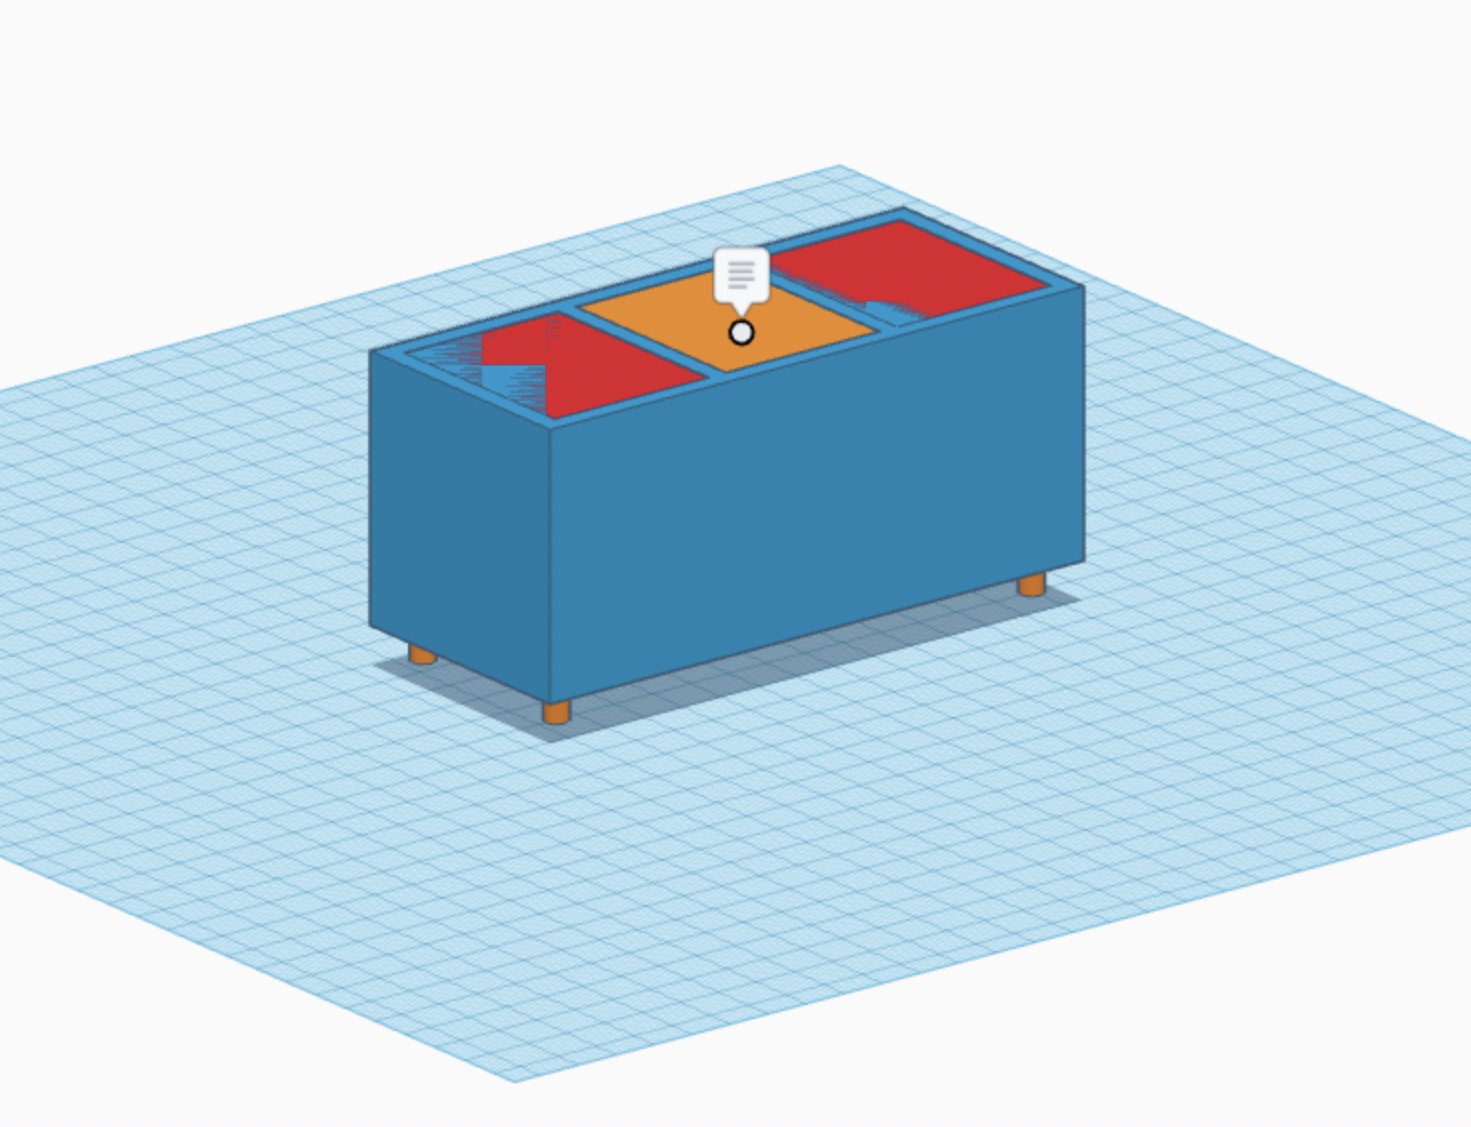
I had Ross Prevost from Esquimalt High help me create a Gary Oak planter box which is was a great help. The Gary Oak really compliments the Camas that I have planted in the one compartment. This relationship is massively significant to the indigenous people of Vancouver Island and creates a great link to that curriculum.

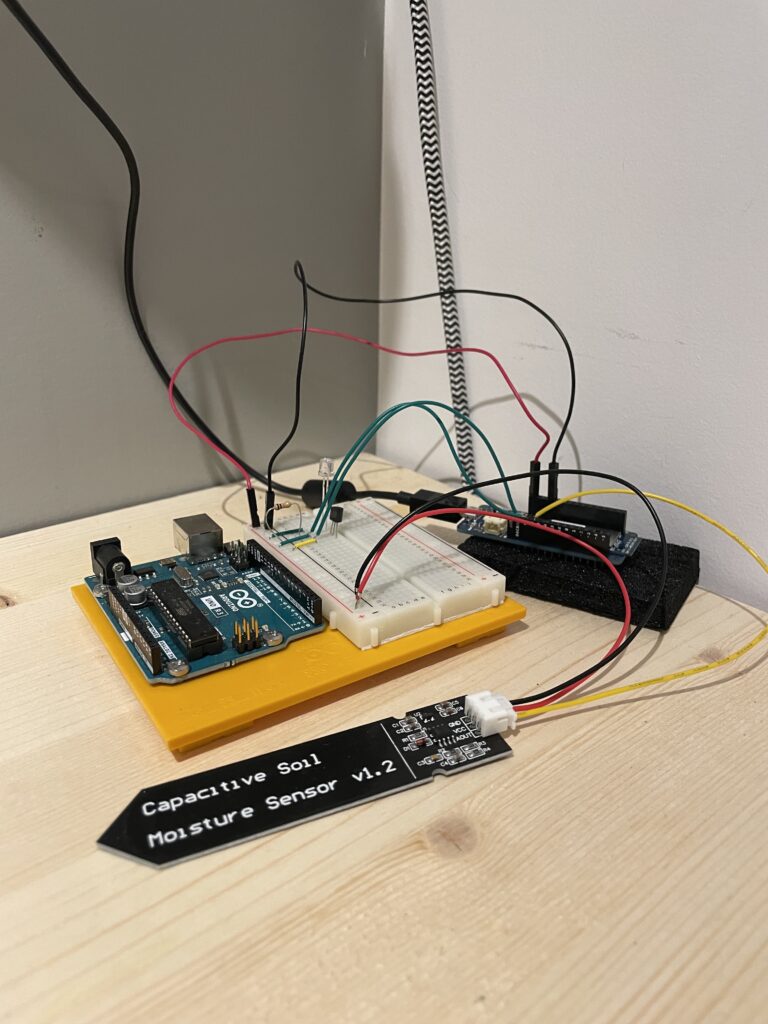
Overall the project was a lot of work, but really cool to see it working! I’m not sure how much I actually learned about electricity, but I learned a lot about woodworking, coding, and planting!

Success!

I finally got the Arduino working through the Arduino IOT application. It took me far too long and far too many cups of coffee, however here we are. I suppose it’s not a matter of how hard I had to struggle to get it working, but that it is and I learned a lot during the path. Not I need to get the planter box made, and plant some Camas!

Arduino IOT

As I have been building my self monitoring garden I have began to use the Arduino IOT service. This is a free wireless service which allows me to wirelessly manipulate and store variables which are connected to my new Arduino MKR1000 board.

This has proven though to be quite a hassle though, for I am unable to get the software to cooperate and fully manipulate the variables on the board.

I need to step back and attempt to just turn an LED on and off as opposed to wiring up all my plant monitoring variables right now. The state of my board is a little hectic, and from what I have learned in previous blog posts; may be a hardware issue. Thus I need to simplify the process, find success in a simpler board, and then progress.

Synonym for the devil: wifi

Well I have slowly received the components for my Arduino garden project. As the inquisitive tech nerd I am I began tinkering around with them. The Arduino MKR 1000 is the wifi board that I got which will communicate my sensor data to a mobile database. I have been attempting to setup/check the wireless connection between the board and the Arduino Iot software (Arduino’s free database).

To begin my session I back wired my temperature sensor which cause it to read temperatures around 200 degrees Celsius. I though to my self; “this must be a mistake”. However upon touching it, it was not at all a mistake. So that took me a long time to figure out that I had back wired it and it was in fact oscillating (which I have no idea what that means).

Anyways, I got the sensor working while wired in, however ended up retiring for the night when I began trying to check the wifi connection. I’m not sure if I have forgotten my wifi password or the output should be 255 when it’s connected? A lot of time spent on this and not a lot of positive movement.

Arduino Inquiry Project

I’m now getting a lot of the hardware shipped to my house. I have the soil moisture meters and have been playing around with them. It’s pretty tricky to get them calibrated to measure water since they measure in a percentage as opposed to a tangible metric.

Moving forward I am beginning to install the Arduino IOT which is a wireless database that will hold the data that my physical Arduino is creating. This seems very tedious and I’m a little nervous it wont work once I get the wireless chip.

https://docs.arduino.cc/cloud/iot-cloud

Inquiry Project

I am now creating a cross curricular arduino project. This project will be my final assignment for my Wednesday placement class. This project aims to combine curricular competencies from wood shop, biology, and computer science by creating a planter box which monitors and waters the plants within it.

This week I ordered the parts I will need to build the electronics. I am basing the system off of this video:

https://www.makerguides.com/automatic-plant-watering-system-with-arduino-iot-cloud/

I also finished 3D rendering the planter box itself with Tinkercad:

Overall, I am feeling pretty overwhelmed with the project due to my lack of experience with an Arduino. However I have a solid support system behind me and I’m looking forward to the challenge. 

Arduino Frustrations

So after hours of tinkering and running different baseline temperatures I found out my problem. My LED pin was backwards. The cathode was where the diode should have been. This was super frustrating, however that was soon lost when the temperature gauge began working! Pretty cool to see it actually respond to my body temperature.

Activity #3

What a tough one.

This weeks task got me to use a lot more dynamic code where I was having to setup baselines and thresholds. Through touching a temperature sensor I was aiming to have lights illuminate in correspondence to my body temperature. I however got really lost in the code and was not able to setup my baseline temperature correctly. As you can see in the first image I was getting a lot of negative, unresponsive baselines. However in the second image you can see i have corrected that issue. My problem now is that the lights are not responding to the code. Thus after a few hours I need to reasses this issue and figure out how to get the lights on!

Activity #2

This week I began my second task in my Arduino book. I decided to integrate some of the class applications into this weeks post. I used a video to demonstrate my work as well as a cool logo that I created at the beginning and end of the video to make it feel more official!

I also had to down res the video in order to upload it directly to Word Press.

Arduino Baby Steps

Finally breaking the plastic on the Arduino kit I was surprised on how much initial work there was to get things going. I waded through boxes of miscellaneous components which all appeared alien to me. It reminded me a lot of playing with Lego as a kid, all these separate vessels of parts with an ominous booklet telling you how to use them.

Not only was there the task of getting oriented with all the components, but I also had to download and IDE for the Arduino as well. Finally, once all the setup instructions had been checked off I was able to start my first project.

The first task is to get an LED to light up. This got me to understand the different ports on the Arduino Board, as well as using the grounding wire. Voltage and current were also introduced topics that felt like old relics getting dusted off in my mind. Resistors and their metric of an OHM’s are still going to need a solid refreshing since they are quite confusing to me.

After picking through every step I finally got the LED to light and it felt great!

My next step is using switches!

« Older posts